Friday, May 11, 2018

Health Benefits of

Diatomaceous Earth

Food grade diatomaceous earth (DE) is a white powder that is almost entirely made of silica.  Silica is a mineral that is already in our body and is an important component of our  ligaments, cartilage, and muscles. When taken as a supplement DE may help to absorb mercury, E. coli, parasites, viruses, pesticide, radiation, drug residues and other toxins.

The only cautionary side effect that we have found relating to food grade diatomaceous earth has to do with direct inhalation and is essentially the same caution that is advised when handling any fine powder. Diatomaceous Earth is a very fine powder. 

Food Grade Diatomaceous Earth is 89% Silica.  It was established in the 1940s that life can’t exist without Silica. More recently, in her book “Water & Salt” Dr. Barbara Hendel states: “Silica is the most important trace element in human health.” Silica plays an important role in many bodily functions and has a direct relationship to mineral absorption.

Yet most people are, in fact, silica deficient.  We carry around 90mcgs of silica per 1 gram of hair we have on our bodies and we carry around 100mcgs of silica per 1 gram of bone.  Silica is in all of our connective tissue and it is so very important to include this mineral in our diets. Silica is mostly found in the fiber portions of whole grains, and the skins of fruits and vegetables.

Among other things, enough silica in the body is vital for calcium absorption to allow calcium supplements to work.

Reported Health Benefits of Silica / Diatomaceous Earth Include:

  1. Maintaining Healthy Blood Pressure Levels
  2. Maintaining Healthy Cholesterol Levels
  3. Better Calcium Utilization for help with Osteoporosis and Healthier Joints
  4. Stimulates Weight Loss
  5. Improvement in Hair, Nails, Teeth & Gums
  6. More Energy


According to Kayla T. Daniel, PhD, CCN and Galen D. Knight, PhD in their article “Mad as a Hatter” there is no better product to detox heavy metals and radiation from your body than with Food Grade Diatomaceous Earth!

Take diatomaceous earth daily on an empty stomach. I recommend starting small and slowly working your way up to a higher dose; begin with a teaspoon added to at least 12 ounces of liquid. Mix vigorously and drink immediately.  Some people don't like the mildly chalky flavor and gritty texture. If that describes you, try adding DE to a drink with more flavor (milk, orange juice, coffee, smoothies) or to light foods like yogurt, oatmeal, or applesauce.

As your body begins to detox, you may experience what is commonly known as "die off," which sometimes gives people mild flu-like symptoms for a couple days. This is a side effect of toxins leaving your body, not a side effect of DE itself. You can counteract these symptoms by increasing your fluid consumption, as well as reducing your DE dose for a couple days.

For gum health, because DE is one of the most nourishing substances for your gums, as your gums are connective tissue, which needs silica. To use it, mix 1 heaping tablespoon with water into a paste consistency. Pack it into your gums overnight after you brushed your teeth. Your gums will absorb the diatomaceous earth.  

If you have other ideas on how to use DE please share!

Friday, May 4, 2018

Healthy Coffee Alternative


HEALTHY AND DELICIOUS

COFFEE ALTERNATIVE 


Topinambour Coffee


Topnambour Coffee is a coffee alternative specially formulated with a roasted and grounded a unique  nutrition blend of roots, beans, seeds, nuts and dry fruits that will help you to wake up and feel more energized.
Topinambour (Jerusalem artichoke) root contains inulin, iron, potassium, and is rich in vitamin C and B1. It also has a very low glycemic index. These features make the topinambour products a great support for diabetics. The addition of dandelion, which is also often a component of anti-diabetic compounds, strengthens the action of topinambour and causes the product to stimulate and detoxify and regulate digestion.

Topinambour coffee is one of better caffeine-free substitutes of natural coffee.  If it hasn’t appeared in your cup yet, maybe it’s worth trying out. If not for its interesting taste as well as scent, then maybe for its medicinal properties. Ingredients include Roasted Organic Topinambour Root; Organic Chicory root; Organic Dandelion Root; Organic Figs; Organic Dates; Organic Carob; Cardamom; Cinnamon and Cloves.

This remarkable drink is also an interesting way to add some variety when having a friend over.  Also, unlike coffee, it can be used not only by adults – children can also drink it!

Try it next time you are at the office or order it now by emailing help@healingartsnyc.com. One package is $14 and makes 20 cups.  


Sunday, April 29, 2018

Advanced Allergy Clearing Technique

A New Service at Healing Arts

Accelerated Allergy Clearing Technique

Do you experience:

Environmental allergies that make you dread seasonal changes?
“Food Allergies” that severely limit your diet (and nourishment)?
Sensitivities to things in your environment that restrict your quality of life?

Symptoms or unwanted health conditions that simply won’t respond, or only respond to treatment temporarily?

These symptoms could be signs of allergies.  If you have allergies, there is an alternative to medication and the impracticality of avoidance…
It is AACT, Accelerated Allergy Clearing Technique. And if you do have seasonal allergies, luckily for you, Nova learned this technique just in time for spring!


Allergies are versatile. They can show up just about anywhere in your body and provide a variety of issues. They can affect your nose, eyes, throat, lungs, stomach, skin and nervous system. They can give you a bellyache, a rash and even bring on fatigue and headache.
In our experience, when major allergies, both food and/or environmental, are present and not handled, they are often interfering with the body’s normal function, repair, and self-correcting mechanisms. Autoimmune disease have risen dramatically due to high levels of polution in the air. This represents a major health problem that experts now think affects one third of the whole population. And if they are not managed properly, people begin to deal with it by avoiding the modern world.

Food sensitivities, environmental allergies, and chemical sensitivities are afflicting more and more people and an individual can be allergic or sensitive to any number of substances including: foods, molds, pollens, animal dander, chemicals, fabrics, medications, MSG, food additives, etc. Allergy symptoms can be over-reactions of the immune system while and/or an imbalance in the body's nervous system. An imbalance in the body's energy can lead to decreased health, so clearing allergies and sensitivities is one way to improve the overall immune system. 


The allergy clearing procedure is a gentle, painless, non-invasive way to relieve symptoms by utilizing acupressure, muscle testing, and nutrition to address underlying problems and bring balance to the body. It is safe on the youngest to oldest of patients. Most begin to notice improvement in just a few sessions, but the full benefit is seen as a patient's overall health improves with the combination of the clearing plus vitamin supplementation. Some common changes with the allergy clearing include: elimination of lactose intolerance, reduction or elimination of IBS, sinus relief, seasonal allergy relief, elimination of eczema and hives, reduction of fatigue, improvement of ADD symptoms, decreased gluten intolerance and bowel gas, and elimination of asthma, just to name a few. 


The following are symptoms that may be related to allergies or sensitivities. If you experience any of these conditions and have not found relief, you may be a candidate for allergy clearing. Symptoms including: acne, canker sores, dark circles under eyes, eczema, hives, itching, constipation, diarrhea, gas, heartburn, vomiting, IBS, asthma, coughing, sinusitis, stuffy nose, bedwetting, joint pains, anxiety, fatigue, bloating, hyperactivity, learning disorders, arthritis, hay fever, post nasal drip, red ear lobes, red cheeks, ear infections, headaches, sore throats, and weight gain.

If you think you may be a candidate for Advanced Allergy Clearing Technique (AACT) call the office, (866) 585-5999 to schedule an initial exam.  

Tuesday, April 24, 2018

How Stress is Effecting Your Health
Your body is hard-wired to react to stress in ways meant to protect you against threats from predators and other aggressors in life or death situations. Such situations are rare today, but that doesn't mean that life is free of stress. 
On the contrary, you undoubtedly face multiple demands each day, such as a huge workload, making ends meet and taking care of your family. Your body treats these so-called minor hassles as threats. As a result you may feel as if you're constantly under stress but the key is to not have the stress control your life or your health.
When you encounter a perceived threat — a large dog barks at you during your morning walk, for instance — your hypothalamus, a tiny region at the base of your brain, sets off an alarm system in your body. Through a combination of nerve and hormonal signals, this system prompts your adrenal glands, located on top of your kidneys, to release a surge of hormones, including adrenaline and cortisol.
Adrenaline increases your heart rate, elevates your blood pressure and boosts energy supplies. Cortisol, the primary stress hormone, increases sugars (glucose) in the bloodstream, enhances your brain's use of glucose and increases the availability of substances that repair tissues. 
Cortisol also curbs functions that would be a problem in a threatening situation. It alters immune system responses and suppresses the digestive system, the reproductive system and growth processes. This complex natural alarm system also communicates with regions of your brain that control mood, motivation and fear. 
The body's stress-response system is usually self-limiting. Once a perceived threat has passed, hormone levels return to normal. As adrenaline and cortisol levels drop, your heart rate and blood pressure return to baseline levels, and other systems resume their regular activities. But when stressors are always present and you constantly feel under attack, that fight-or-flight reaction stays turned on. 
The long-term activation of the stress-response system — and the subsequent overexposure to cortisol and other stress hormones — can disrupt almost all your body's processes. This puts you at increased risk of numerous health problems, including:
  • Anxiety
  • Depression
  • Digestive problems
  • Headaches
  • Heart disease
  • Sleep problems
  • Weight gain
  • Memory and concentration impairment
When we help patients with their stress our goal is to give them the right nutrition to calm the nervous system down, get them out of fight-or-flight response, and to rebuild the adrenal glands that have been producing adrenaline and cortisol for too long of a period.  Here are a few of my favorite supplements to use:
  • Drenamin supports adrenal function and helps maintain emotional balance and energy production
  • Vitamins C, E and all the B vitamins help regulate stress hormones.
  • Magnesium provides energy to the adrenal glands.
  • Calcium and trace minerals including zinc, manganese, selenium, and iodine provide calming effects in the body.
Besides the right supplements it's important to learn healthy ways to cope with the stressors in your life. 
Your reaction to a potentially stressful event is different from anyone else's. How you react to stressors in your life is affected by such factors as: 
  • Genetics. The genes that control the stress response keep most people on a fairly even keel, only occasionally priming the body for fight or flight. Overactive or underactive stress responses may stem from slight differences in these genes. 
  • Life experiences. Strong stress reactions sometimes can be traced to traumatic events. 
You may have some friends who seem laid-back about almost everything and others who react strongly at the slightest stress. Most reactions to life stressors fall somewhere between those extremes. 
Stressful events are a fact of life. And you may not be able to change your current situation. But you can take steps to manage the impact these events have on you and your health. 
You can learn to identify what stresses you and how to take care of yourself physically and emotionally in the face of stressful situations. 
Stress management strategies include:
  • Eating a healthy diet and getting regular exercise and plenty of sleep 
  • Practicing relaxation techniques such as trying yoga, practicing deep breathing, getting a massage or learning to meditate 
  • Taking time for hobbies, such as reading a book or listening to music 
  • Fostering healthy friendships 
  • Having a sense of humor 
  • Volunteering in your community
  • Seeking professional counseling when needed
The payoff for learning to manage stress is peace of mind and — perhaps — a longer, healthier life.


Monday, April 2, 2018

Health Benefits of Doing Castor Oil Packs

Castor Oil Packs for Liver and Digestion Support

Castor oil comes from the castor seed, native to India. It is extremely high in ricinoleic acid, which is thought to be responsible for its health-promoting abilities. I love to suggest the castor oil pack to patients for liver detox or digestion support.  It is really good for patients with the MTHFR mutation to do a castor oil pack once a week to keep the liver detoxing well despite the gene mutation.  
The idea is to keep castor oil on a piece of cloth on the skin for at least an hour with a heat source to stimulate lymph and liver function. I have had many accounts of patients who noticed better digestion, immediate better sleep, more energy, and clearing of skin symptoms.
NOTE: Check with me or your health care provider before doing a castor oil pack.  It should not be used if pregnant.

The beauty of a castor oil pack is by placing it on the right side of the abdomen or the whole abdomen  is thought to help support the liver and digestive system. It can also be placed directly on strained joints or muscles to reduce inflammation.  (Note: This is not as a substitute for medical care but to speed healing of minor injuries.  Also put on the lower abdomen to help with menstrual pain and difficulties.

What It Does

Castor oil packs harness the anti-inflammatory and lymph stimulating benefits of castor oil but allow safer external use. From a 1999 study:
With a minimal 2-hour therapy period, this study found that castor oil packs produced a “significant” temporary increase in the number of T-11 cells that increased over a 7 hour period following treatment and then returned to normal levels within 24 hours later.
The T-11 cell increase represents a general boost in the body’s specific defense status. Lymphocytes actively defend the health of the body by forming antibodies against pathogens and their toxins. T-cell lymphocytes originate from bone marrow and the thymus gland as small lymphocytes that identify and kill viruses, fungi, bacteria, and cancer cells. T-11 cell lymphocytes supply a fundamental antibody capability to keep the specific defense system strong.
In short, castor oil packs have been said to help detoxify the liver naturally, improve lymphatic circulation, and reduce inflammation.
There is some evidence that it can have a suppressive effect on tumors and a positive effect on arthritis.

How to Do a Castor Oil Pack

Castor oil packs are simple to do at home and I like them because they require me to be still and relax and read a book for at least an hour (not always easy to accomplish). They can be messy, but with proper preparation are not.

You’ll Need

  • high-quality castor oil (hexane free)
  • unbleached and dye free wool or cotton flannel – can be reused up to 30 times
  • a wrap-around pack (or large piece of cotton flannel) or plastic wrap 
  • hot water bottle or heating pad
  • glass container with lid – I use a quart-size mason jar for storing the oil soaked flannel between uses
  • old clothes, towels and sheets – castor oil does stain!

NOTE: I highly recommend carefully prepping the area where you’ll be doing the castor oil pack to prevent mess.  Try using an old shower curtain, covered with a sheet under you to make sure nothing stains. I don’t often have to wash the sheet, and I just fold and store in the bathroom cabinet for the next use.

How to Use a Castor Oil Pack

  1. Cut a large piece of cotton flannel and fold into thirds to make three layers. My original piece was 20 inches by 10 inches and when folded it was roughly 7 inches by 10 inches. Yours could be larger or smaller, depending on where you are planning to place it.
  2. Thoroughly soak (but not completely saturate) the flannel in castor oil. The easiest way I found to do this was to carefully fold the flannel and place in a quart-size mason jar. I then added castor oil about a tablespoon at a time (every 20 minutes or so) to give it time to saturate. I also gently shook the jar between adding more oil so that the oil could reach all parts of the cloth. Ideally, this should be done the day before to give it time to evenly soak. I save the jar since this is where I keep the flannel between uses (it can be used about 30 times).
  3. Carefully remove and unfold the castor oil soaked cloth.
  4. While lying on an old towel or sheet, place the cloth on the desired body part.
  5. Cover with the wrap-around pack or cotton flannel, and place the heating pack on top of this. Less optimally, a plastic grocery bag can be used prevent any oil from getting on the heating pad. A hot water bottle, electric heating pad, or rice heating pad can be used, but hot water bottles and rice packs may need to be reheated several times.
  6. Lie on back with feet elevated (I typically lie on the floor and rest my feet on the couch) and relax for 30-60 minutes.
  7. Use this time to practice deep breathing, read a book, meditate, or pray (or whatever you find relaxing).
  8. After the desired time, remove the pack and return the flannel to the glass container. Store in fridge.
  9. Use a natural soap or a mix of baking soda and water to remove any castor oil left on the skin.
  10. Relax and rest. Make sure to drink enough water and stay hydrated after doing this to support detox.

Other Ways to Use Castor Oil

Castor oil is handy to have around the house for other uses as well. Use castor oil externally to:
  • Apply to dry skin, rashes, boils, age spots, warts, and any undesirable skin defects
  • Treat toenail fungus
  • Soothe a sprain, injury, or sore joints
  • Apply to areas of back pain
  • To cleanse and soothe abdomen when having digestive or reproductive trouble
As a rule of thumb, when trouble begins, apply a series of castor oil packs for 60-90 minutes about 3 times a week for a 3 week period. Consult with a doctor to be exact on how many times a week is good for you.  
Have you ever used a castor oil pack?  Share your experience below!


Tuesday, March 27, 2018

Best Natural Whitening Toothpaste


I have been doing a lot of research on the hype of using charcoal powder for brushing teeth for a whiter, cleaner smile and I finally found what I think is the best one out there!  I got interested in it as a natural alternative to whiten teeth instead of using chemicals.  It's different than the charcoal we use for cookouts. The charcoal used for brushing teeth is reheated and oxidized.  It's called activated charcoal and has natural adhesive qualities that let it bind with surface-staining culprits like coffee, tea, wine, and plaque, taking them off your teeth for good when you spit it out.kombucha tea 

As far as safety goes, the fine, odorless and tasteless powder is okay to ingest, that’s why it’s sold in health food stores in tablet form. In tablet form it is used to clean the gut and detox because it binds to toxins there.  I truly believe it can be used daily except for pregnant or lactating women who should do it only once a week because we don't want what is swallowed to then detox the body and have the detox  upset the baby.  

Youtube is full of videos of people using it and it does look weird for sure.  Good news it is easy to clean out so there is no black residue to find later.  Lots of companies have charcoal toothpastes, even Colgate has one but the one I use and love is Carbon Coco.  


If you are not interested in black toothpaste to whiten your teeth (what a paradox) then my other favorite toothpaste is Himalayan Neem and Pomegranate toothpaste which sounds like a weird flavor but tastes great!  It's all-natural and specifically fluoride free.  Buy it on Amazon or at the office for your convenience.


Monday, March 19, 2018

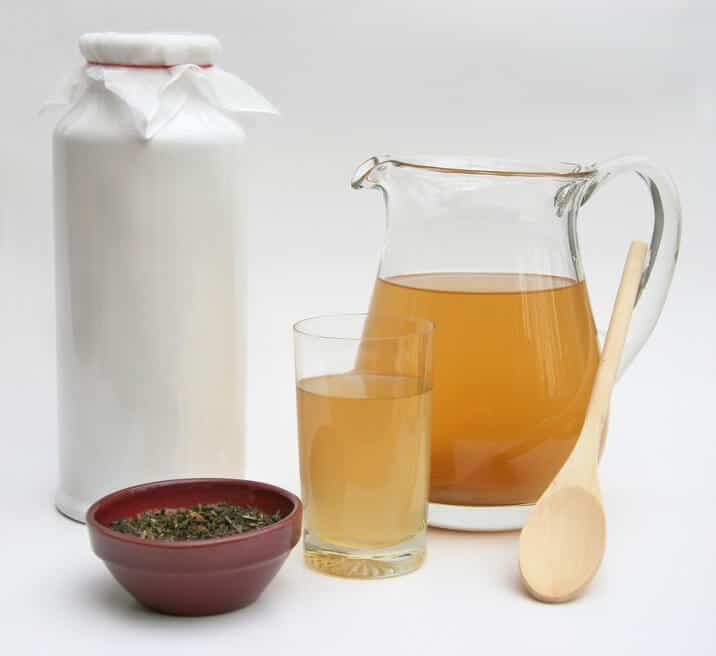
DIY How to Make Kombucha

Kombucha is simple to make yourself. We recommend you give it a shot because brewing your own unpasteurized kombucha is rewarding when you consider the cost of purchasing store-bought bottles.
To learn more about the health benefits, read here. It's beneficial to drink at least half a cup daily to get the health benefits.  This recipe makes about eight cups of kombucha, but you can also double the recipe to make more, and you still only need one SCOBY disk.

Kombucha Recipe

kombucha tea
Yields: 8 cups
You need:
  • 1 large glass or metal jar or bowl with a wide opening
Avoid using a plastic jar or bowl because the chemicals in the plastic can leach into the kombucha during the fermentation period. Ceramic pots might cause lead to leach into the kombucha once the acid comes into contact with the ceramic glaze. Look for a big metal or glass jug/jar/bowl and make sure the opening is wide enough to allow a lot of oxygen to reach the kombucha while it ferments.
  • 1 large piece of cloth or a dish towel
Secure this material around the opening of the jar with a rubber band. Do not use a cheese cloth, as it allows particles to pass through. You can even try using an old thin cotton t-shirt or some simple cotton fabric from any textile store.
  • 1 SCOBY disk
You can find a SCOBY disk in health food stores or online for relatively inexpensive amounts. A SCOBY disk can be vacuum-sealed in a small pouch and shipped directly to your house for only a few dollars, while still preserving all of the active yeast ingredients.
  • 8 cups of water
I would use filtered water, if possible.  
  • ½ cup organic cane sugar or raw honey
Yes, this is one of the few times I’ll tell you to use real sugar! Most of it is actually “eaten” by the yeast bacteria during the fermentation process, so there is very little sugar left in the recipe by the time you consume it. It is important to use only organic cane sugar and not white refined sugar.

  • 4 organic tea bags
Traditionally, kombucha is made from black tea, but you can also try green tea to see which you prefer.
  • 1 cup of pre-made kombucha
You’ll need to purchase your first batch or get a cup from a friend who has recently made homemade kombucha. For future batches, just keep a cup on hand for the next time. Be sure to purchase only organic, unpasteurized kombucha. Pasteurized varieties do not contain the appropriate live cultures you need.
Directions:
1. Bring your water to boil in a big pot on the stovetop. Once boiling, remove from heat and add your teabags and sugar, stirring until the sugar dissolves.
2. Allow the pot to sit and the tea to steep for about 15 minutes, then remove and discard tea bags.
3. Let the mixture cool down to room temperature (which usually takes about one hour). Once it’s cooled, add your tea mixture to your big jar/bowl. Drop in your SCOBY disk and 1 cup of pre-made kombucha.
4. Cover your jar/bowl with your cloth or thin kitchen towel and try to keep the cloth in place by using a rubber hand or some sort of tie. You want the cloth to cover the wide opening of the jar and stay in place but be thin enough to allow air to pass through.
5. Allow the kombucha to sit for 7–10 days, depending on the flavor you’re looking for. Less time produces a weaker kombucha that tastes less sour, while a longer sitting time makes the kombucha ferment even longer and develop more taste. Some people have reported fermenting kombucha for up to a month before bottling with great results, so taste test the batch every couple of days to see if its reached the right taste and level of carbonation for you.
Usually, the warmer your home is, the less time the kombucha needs to ferment. Once you’re happy with the taste, put your kombucha into smaller glass bottles and refrigerate the kombucha for at least 24 hours to allow it to cool and finish carbonating. The longer you refrigerate it before opening, the more fizzy it will be.
Note that as the fermentation process happens, you will notice that the SCOBY disk “grows” a second SCOBY disk. Many people call the SCOBY that you purchased and used to make the kombucha the “mother” SCOBY and the second SCOBY that grows the “baby.” The mother SCOBY is located on top of the baby.
You can actually use the newly formed baby SCOBY to create a whole new batch of kombucha, so you don’t want to throw out the baby disk. Store the baby SCOBY in a bit of already-made kombucha in a glass jar while not using it so you have it on hand to start a new batch when you want it. It will be “active” for several weeks when it’s stored in some kombucha at room temperature on a counter top or in a pantry.
While some people prefer to keep the mother SCOBY disk attached to the baby, others prefer to throw away the mother SCOBY once the kombucha is finished fermenting.
Keeping the mother disk hasn’t caused any reported problems or contamination. According to some sources, the mother disk can keep fermenting new kombucha batches for about another month after its first use but will then become inactive and should be thrown away.

Brewing Flavored Kombucha

The recipe above is for a basic, unflavored kombucha. You can try adding unique flavors like fresh-squeezed lemon or lime juice, ginger root “juice” made by blending ginger and water, blended berries, fresh-squeezed orange, pomegranate or cranberry juices.
We recommend doing this after the kombucha has fermented and is ready to drink, although some people prefer to add flavor-enhancers to the kombucha a day or two before it’s done so the flavor can intensify. Either way seems to work well.

Storing Kombucha

Once your homemade kombucha is complete you’ll want to store it in a clear glass bottle or jar with a tightly fit lid, preferably not metal, if you have the option. Plastic bottles may swell or harden and color from dyed jars can get into the drink.
When bottling kombucha, leave an inch or less of air at the top of the bottle. This should allow for an appropriate amount of carbonation.
It’s important never to shake a bottle of kombucha and risk exploding its container. Try holding your entire hand over the lid as you open it to prevent it from popping off unexpectedly.
Be sure to refrigerate your completed kombucha to extend its shelf life. If you’ve added flavoring, consider that when storing the kombucha. For example, fresh fruits will go bad in the kombucha long before the drink.

Kombucha Precautions

Most people experience great benefits drinking kombucha and have no adverse side effects.
Kombucha side effects seem to be more of a risk when making homemade kombucha because contamination is possible, and the SCOBY disk and finished product aren’t tested for quality like they are when manufactured commercially. If you’re going to brew your own, use sterile equipment, clean working spaces and high-quality ingredients.
A small percentage of people experience bloating, nausea, infections and allergic reactions when drinking kombucha. Because kombucha has a high level of acidity, it’s possible that this can cause problems for people with digestive problems like heartburn or sensitivity to very acidic foods.
If you are concerned about these issues, start drinking a small amount in moderation and gradually work your way up to drinking more in order to see if you have any negative reactions to it. Stick to about eight ounces per day or less, especially in the beginning. To limit your risk, buy pre-made, unpasteurized kombucha that’s been tested for bacterial contamination.
Kombucha is brewed using black tea and sugar, which when fermented, turns into alcohol in very small amounts (only about 1 percent of kombucha is believed to be alcohol). So a warning to those who are avoiding alcohol.

Otherwise enjoy this healthy drink!